Why EC2 and not RDS?
The first thing you might wonder is why you would want your database in an EC2 instance when you have a managed service (RDS) where you don’t have to bother with maintaining your server, updating it, and having automated daily backups with one click. The main reason is COST; this option is roughly half of the RDS price. I’m also using one of the new ARM instances, a similar technology to the new Apple ARM CPUs but running on the server. So if you’re running a side project and only need a simple single host setup, I think this approach is a perfect solution, using a t4g. micro EC2 instance costs about $6 per month.
1. Launch the EC2 instance
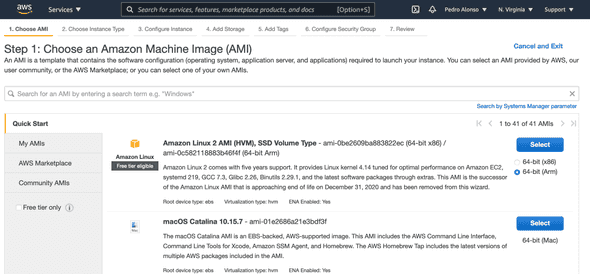
Log in to the AWS EC2 console and provision a Linux server to host the DB. Make sure to select the ARM architecture. I’ll be using Amazon Linux 2 ARM.
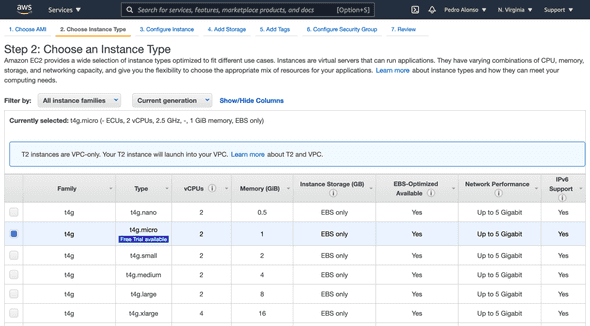
For instance type, I’ll be using t4g.micro, which is free while it’s not generally available until the end of March 2021.
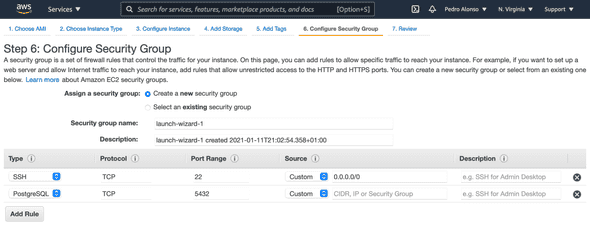
Next, I’ll configure the security group to allow SSH access and PostgreSQL access on port 5432. Depending if you are planning to host your application code in this same server or a different one, you will need to open this port or not. But if you’re going to have another EC2 instance with your application code, then I’d suggest opening your DB port (5432) only to your “Web Security Group”. To connect to the DB server from my local laptop, I use SSH; TablePlus easily connects to your DB via SSH.
Once your setup is ready, launch your instance, wait until it is running, so we can connect via SSH. Make sure to move your .pem file for SSH authentication to ~/.ssh and assign the right permissions running the following command in your terminal:
$ chmod 0400 ~/.ssh/your-server-identity.pem
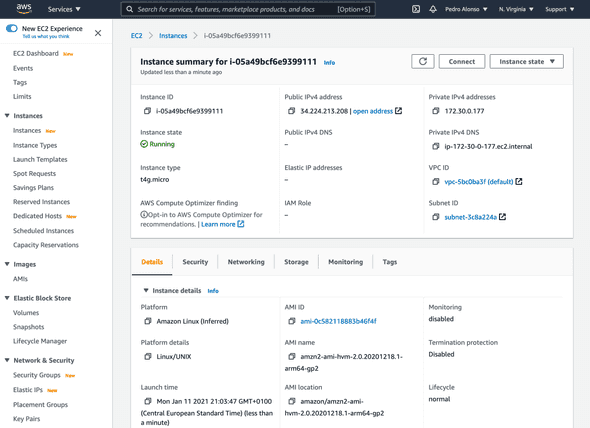
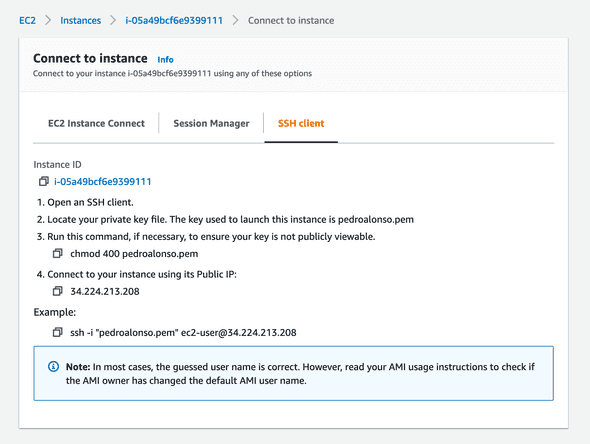
Click on the “Connect” button to get the SSH command details to connect to the instance and set the database up.
2. Install PostgreSQL
Now that our server is set up and running connect using your SSH key.
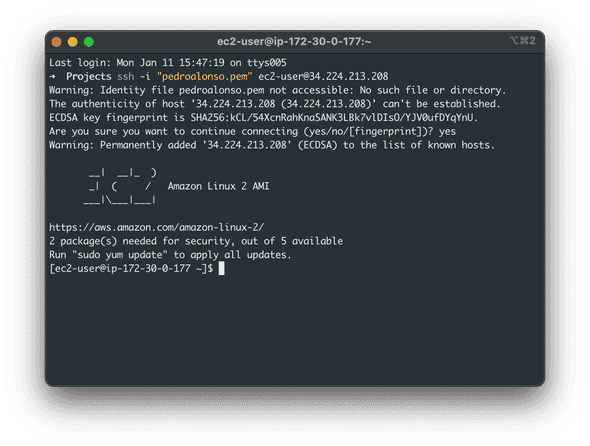
After a successful connection, run these commands in the server to install and configure PostgreSQL Database.
# Enable the repository to install PostgreSQL
$ sudo yum update
$ sudo amazon-linux-extras enable postgresql11

# Install PostgreSQL server and initialize the database
# cluster for this server
$ sudo yum install postgresql-server postgresql-devel
$ sudo /usr/bin/postgresql-setup --initdb

# Start the DB service
$ sudo systemctl enable postgresql
$ sudo systemctl start postgresql

# To check if the Postgres service is running or not
$ sudo systemctl status postgresql
To be able to connect to PostgreSQL, we still have to configure authentication. Client authentication is controlled by a configuration file, which traditionally is named pg_hba.conf and is stored in the database cluster’s data directory. In this specific version of Linux, the file that we need to edit is **/var/lib/pgsql/data/pg_hba.conf**. I have edited mine; as you can see in the screenshot, I’m not using custom username/passwords, but you can tweak yours as you need. Bear in mind that by default, PostgreSQL is only accepting connections from localhost at the moment.
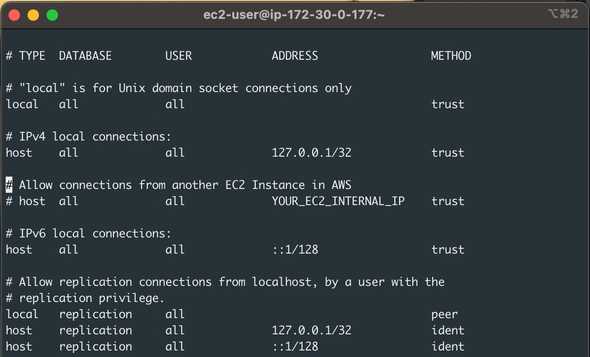
As I mentioned, at the moment, we can only connect to our DB server from localhost, so if we want to run our application code in a different server, we need to configure the server to listen outside TCP connections. In this specific Linux server, we need to edit **/var/lib/pgsql/data/postgresql.conf**. In the screenshot above, you can see that I added a specific line allowing authentication from another EC2 Instance in AWS. It’s not a good idea to leave permissions open to the public internet for security reasons.
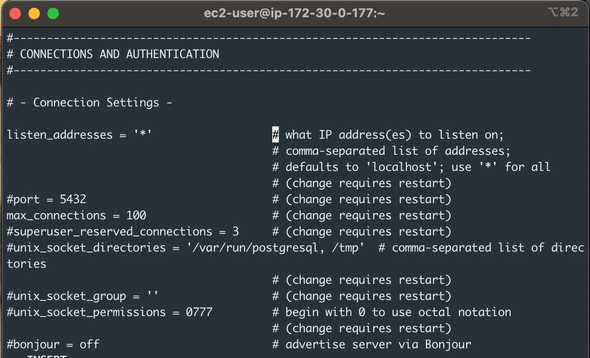
If we save the changes to the previous two files, we can start the PostgreSQL server and verify that it’s running:
$ sudo service postgresql start
$ sudo service postgresql status
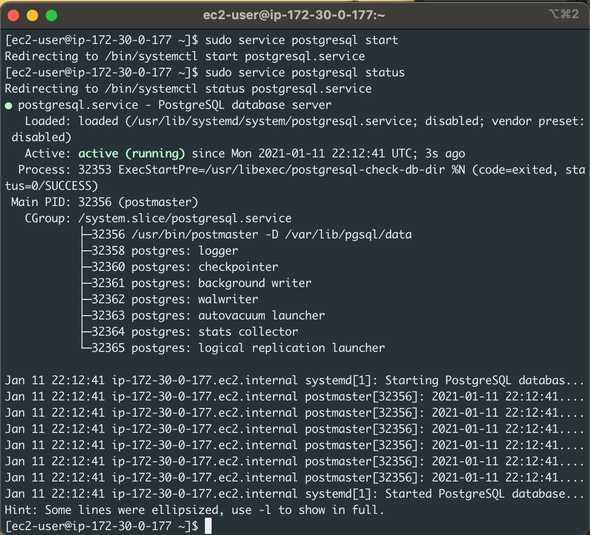
You can also manage the DB server from the command line:
$ psql -h localhost -U postgres
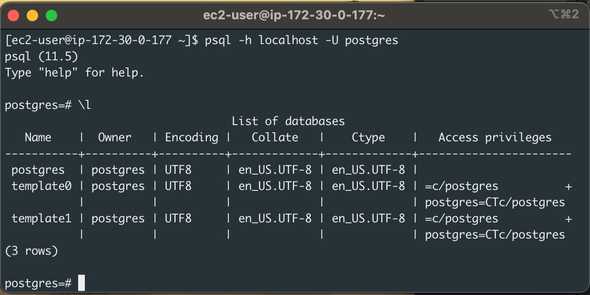
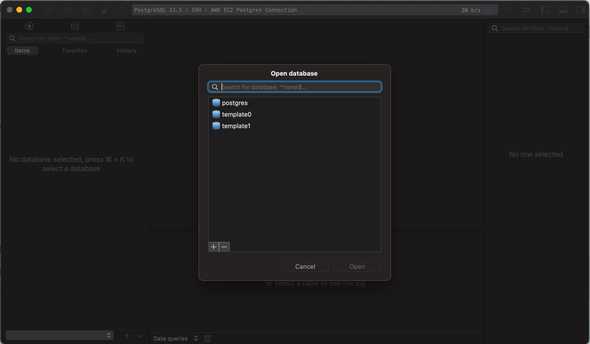
As I mentioned, I use Table Plus as UI for my databases, and I can connect using SSH to the EC2 instance and then use localhost to connect to the server. But you can use any other UI of your preference as well.
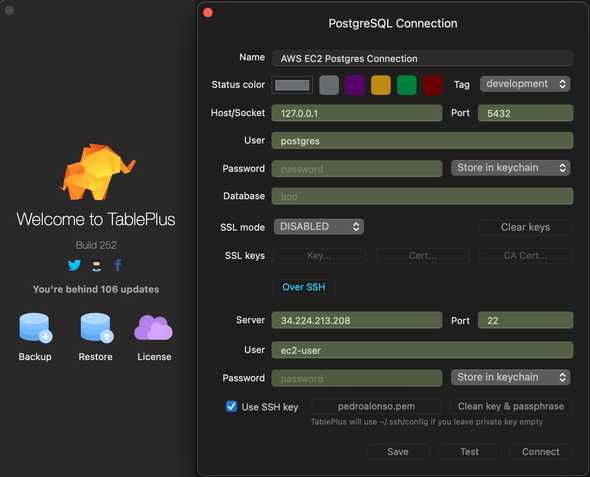
After you connect, you can select the DB that you need, create new ones, etc.
3. Backup strategy for our instance
Now that we have our DB server up and running, it’s a good idea to have a backup in place if something goes wrong and we need to restore it.
3.1 Backup the whole EBS Volume - EC2 Instance Hard Drive
I want to mention that this approach would have a few seconds of downtime; depending on the type of system you have, this might be acceptable. Otherwise, I’d go with the option I explain in section 3.2.
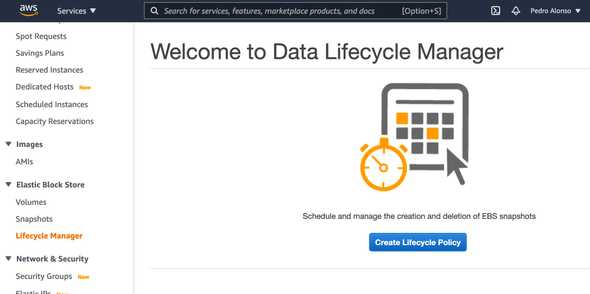
To set up the backup, go to EC2 > Elastic Block Store > Lifecycle Manager, and click on ‘Create a Lifecycle Policy’.
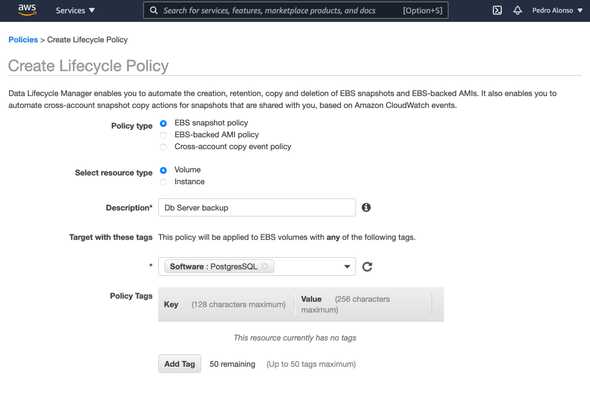
Give the policy a name, and I’m using a Tag to select the instance that I want to backup using this policy.
Define the schedule and retention for your backups.
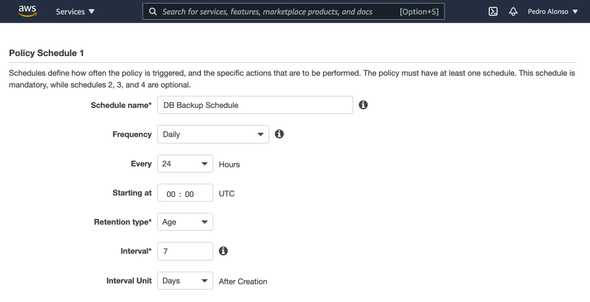
Once you save the policy, your backups will be created on the schedule that you’ve defined. It’s straightforward.

Keep in mind that you’re backing up the whole server using this method, so if you need to restore, you need to launch a new instance from one of your backups.
3.2 Run a backup script as CRON and save the output to S3
We can also create a script and run it scheduled using Cron in the system, with the following steps:
- Database backup with pg_dump command.
- Compression with BZip2.
- Encrypt the file.
- Upload it to S3.
#!/bin/bash
export DUMP_FILE=/backup_`date +%Y%m%d_%H%M%S`.pgdump
PGPASSWORD=$POSTGRES_PASSWORD pg_dump -d $POSTGRES_DB -U $POSTGRES_USER -h $POSTGRES_HOST -f $DUMP_FILE
bzip2 $DUMP_FILE
mcrypt ${DUMP_FILE}.bz2 -k $DB_BACKUP_PASSWORD
aws s3 cp ${DUMP_FILE}.bz2.nc $S3_BACKUP_PATH
Bear in mind that you need to install mcrypt running:
$ sudo amazon-linux-extras install epel
$ sudo yum install mcrypt
Once you’ve set up the script and install the dependencies, you can execute it manually to verify that it works, and set up the cron to run as often as you need.
4. Conclusion
As you can see, this method is not as convenient as a managed RDS Database server, but it’s cheaper, and it’s also a good learning experience. In my next post I show you how you can automate this process using Terraform, so it’s not a manual process anymore. I would recommend this method for a production system if you have a single database host. In case you don’t need failover or start complicating the architecture, using RDS would be very beneficial as AWS does all the management. Subscribe to my Newsletter if you want to be informed when my new content is available. Don’t hesitate to leave your comments or suggestions.
